Python滤镜和图像风格迁移
任务一
1.了解滤波器
在百度百科中寻找“图像滤波器”会得到一段看起来非常让人困惑的文字:
由于成像系统、传输介质和记录设备等的不完善,数字图像在其形成、传输记录过程中往往会受到多种噪声的污染。另外,在图像处理的某些环节当输入的像对象并不如预想时也会在结果图像中引入噪声。这些噪声在图像上常表现为一引起较强视觉效果的孤立像素点或像素块。一般,噪声信号与要研究的对象不相关它以无用的信息形式出现,扰乱图像的可观测信息。对于数字图像信号,噪声表为或大或小的极值,这些极值通过加减作用于图像像素的真实灰度值上,对图像造成亮、暗点干扰,极大降低了图像质量,影响图像复原、分割、特征提取、图像识别等后继工作的进行。要构造一种有效抑制噪声的滤波器必须考虑两个基本问题:能有效地去除目标和背景中的噪声;同时,能很好地保护图像目标的形状、大小及特定的几何和拓扑结构特征 。
理解图像滤波器概念,其实质有二:
一、图像本质上就是各种色彩波的叠加
图像在计算机里是按照每个位置的像素值存储的,每个像素的颜色,可以用红、绿、蓝、透明度四个值描述,大小范围都是0 ~ 255,比如黑色是[0, 0, 0, 255],白色是[255, 255, 255, 255]。(也就是我们常用的rgba)
把每一行的像素的rgb值以折线形式绘制出来,就会得到一段图像:
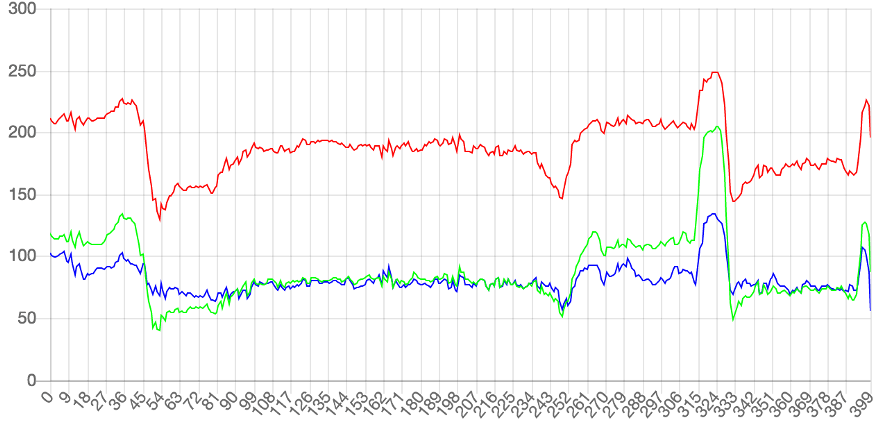
所以可以理解为:图像就是色彩的波动:波动大,就是色彩急剧变化;波动小,就是色彩平滑过渡。
而滤波器的功能,就是将这些波动的变化进行削弱或者放大,例如物理中的:
低通滤波器过滤高频信号,曲线将变得平滑;高通滤波器放大了高频信号,曲线保留下曲折尖锐的部分
在图像中的表现则是:
-
低通滤波器:图像变得模糊(锐度下降)
-
高通滤波器:图像只剩下锐度极高的部分,其他部分的色彩丢失
虽然实际应用的滤镜比单纯的高通低通滤波器复杂,但本质上应该也是附加规则的高低通滤波器的组合。
二、理解卷积算法
PIL库中的滤镜算法主要涉及到卷积滤镜,即在数字图像的像素矩阵中使用一个n*n的矩阵来滤波(该矩阵即卷积核kernal),以这个矩阵为单位对图像像素进行遍历,每个输出的像素都是区域像素按照一定权重组合计算出的结果,遍历之后输出的图像就是输出的图像。(即依据“规则”通过每个像素点附近的像素值来修改当前像素点的值,遍历修改后就完成了滤波)
这张Gif很好的描述了卷积算法的过程,所以被我偷了下来,嘻嘻
2.尝试使用现成的滤波器
阅读Doc容易发现,在python的PIL库中,ImageFilter类下有许多滤波器可以使用:
• BLUR:模糊滤波
• CONTOUR:轮廓滤波
• DETAIL:细节滤波
• EDGE_ENHANCE:边界增强滤波
• EDGE_ENHANCE_MORE:边界增强滤波(程度更深)
• EMBOSS:浮雕滤波
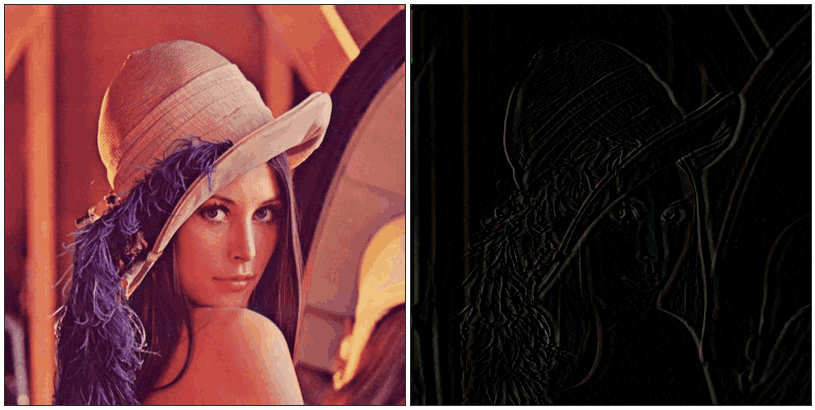
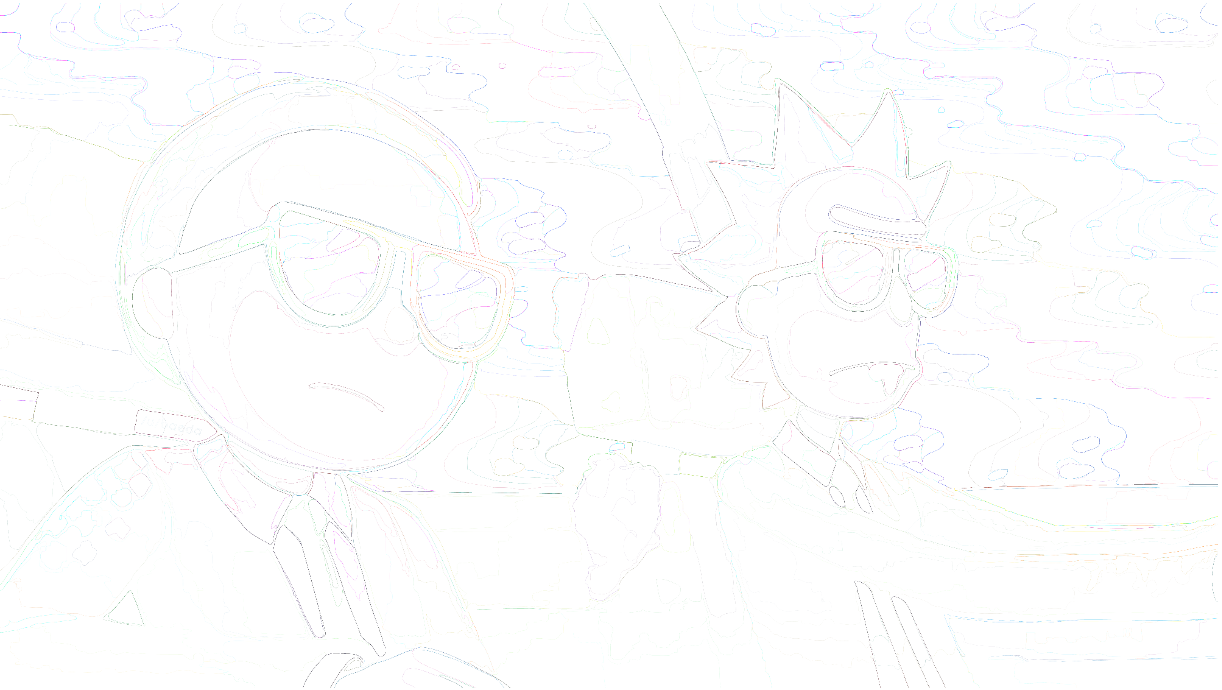
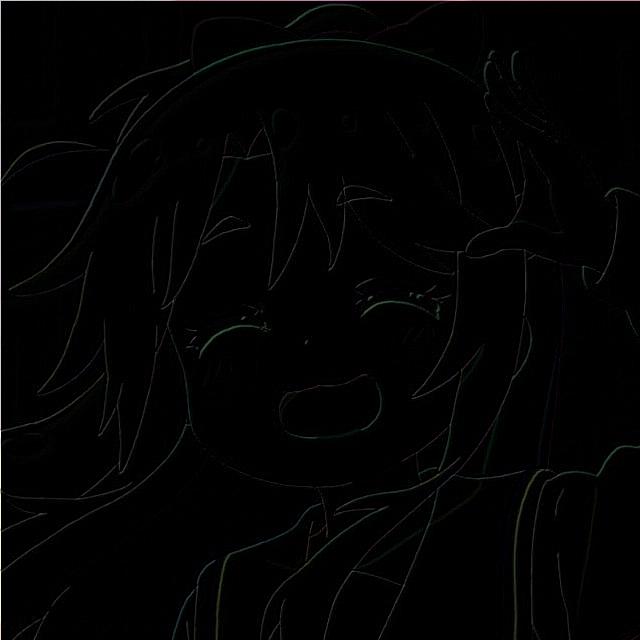
• FIND_EDGES:寻找边界滤波
• SMOOTH:平滑滤波
• SMOOTH_MORE:平滑滤波(程度更深)
• SHARPEN:锐化滤波
• GaussianBlur(radius=2):高斯模糊
>radius指定平滑半径。
• UnsharpMask(radius=2, percent=150, threshold=3):反锐化掩码滤波
>radius指定模糊半径;
>percent指定反锐化强度(百分比);
>threshold控制被锐化的最小亮度变化。
• Kernel(size, kernel, scale=None, offset=0):核滤波
当前版本只支持核大小为3x3和5x5的核大小,且图像格式为“L”和“RGB”的图像。
>size指定核大小(width, height);
>kernel指定核权值的序列;
>scale指定缩放因子;
>offset指定偏移量,如果使用,则将该值加到缩放后的结果上。
• RankFilter(size, rank):排序滤波
>size指定滤波核的大小;
>rank指定选取排在第rank位的像素,若大小为0,则为最小值滤波;若大小为size * size / 2则为中值滤波;若大小为size * size - 1则为最大值滤波。
• MedianFilter(size=3):中值滤波
>size指定核的大小
• MinFilter(size=3):最小值滤波器
>size指定核的大小
• MaxFilter(size=3):最大值滤波器
>size指定核的大小
• ModeFilter(size=3)**:波形滤波器
选取核内出现频次最高的像素值作为该点像素值,仅出现一次或两次的像素将被忽略,若没有像素出现两次以上,则保留原像素值。
>size指定核的大小
一段简单的代码可以测试两个滤波器:
|
|
可以看到不同滤波器带来的不同的改变:


3.自己实现卷积滤波器
1.伟大的第一步,确定算法基本思路
- 初始化设置卷积核
- 读取图像二维列表形式存储的像素值
- 执行遍历获取新的像素值并存储到新的列表中
2.尝试实现
初始化设置卷积核:
|
|
读取图像二维列表形式存储的像素值,并分离三通道:
|
|
执行遍历获取新的像素值并存储到新的列表中:
|
|
最后把三通道合并,将函数分块获得最终代码:
|
|
对一个憨憨表情包处理后的结果如下:

![[1, 1, 0],[1, 0, -1],[0, -1, -1]](https://kevinmatt-1303917904.cos.ap-chengdu.myqcloud.com/20201015163919.jpg)
![[1, 1, 0],[1, 0, 1],[0, 1, -1]](https://kevinmatt-1303917904.cos.ap-chengdu.myqcloud.com/20201015164304.jpg)
![[1, 5, 0],[1, 0, -1],[0, -1, -1]](https://kevinmatt-1303917904.cos.ap-chengdu.myqcloud.com/20201015164002.jpg)
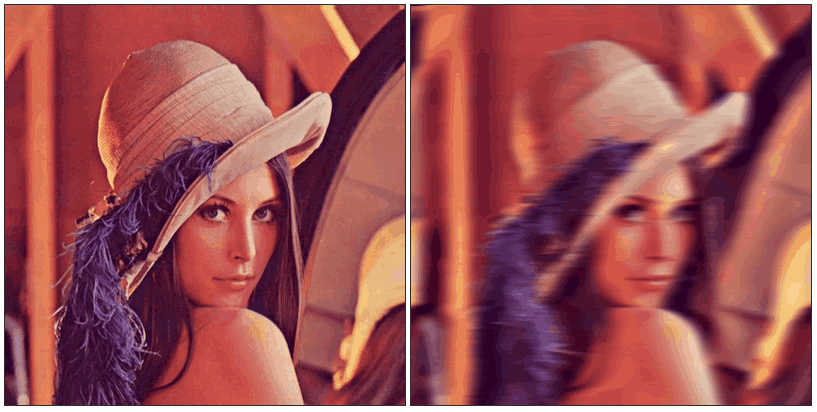
3.均值模糊/高斯模糊
要使用滤镜达到模糊的效果,我们可以理解为“图像细节的丢失”,但这种丢失不是简单的丢失了像素点,而是像素点和附近像素点的像素值差降低了,也就是更加“平滑”了,这一点和前面提到的“低通滤波器”比较类似。
要降低像素差值,我们可以对每个像素取附近像素点的平均值,这样每个像素值之间的差值就相应减少了。
-
均值模糊
直接在卷积遍历过程中求整个矩阵的平均值并赋值给对应像素点:
修改求和函数即可做到效果如图:
1 2 3 4 5 6 7def calculate(img, core): result = (img * core).sum() / 9 # *矩阵乘法获得结果像素值并求平均值 if(result < 0): # *过滤无效像素值 result = 0 elif result > 255: result = 255 return result效果举例:


-
高斯模糊
因为图像像素点分布实际上不是简单分布,每个像素点附近的像素点存在一定的连续性,距离越远,连续性就越不明显,这样的分布特点和正态分布一致,于是有使用正态分布(高斯函数)的方式来模糊处理图像的算法,这样的模糊方法因为过渡更加符合现实情况,在实拍的图片中使用效果会显得更加真实。
因为是二维的图像,所以需要使用到二维高斯函数:
$$ G(x,y)=\frac1{2\mathrm{πσ}^2}e^\frac{ { }^{-(x^2+y^2)} } {2\sigma^2} $$
其中,σ为模糊量,因为在正态分布中σ为方差,其值越大曲线越扁平,相应的模糊过渡越平滑,所以模糊量越大
此外,卷积核的半径与模糊程度也呈现正相关关系
实现起来也并不难,只需要计算出高斯函数的值并转化sum(core)=1就完成了:
|
|
效果如图:


4.其他滤镜
锐化类滤镜:主要通过强化中心像素值(即赋予高权重)的方式来增强边缘区域的特征
-
浮雕滤镜

 $$
\begin{array} {ccc}-1&0&0\0&1&0\0&0&0\end{array}
$$
$$
\begin{array} {ccc}-1&0&0\0&1&0\0&0&0\end{array}
$$ -
轮廓提取
 $$
\begin{array} {ccc}-1&-1&-1\-1&8&-1\-1&-1&-1\end{array}
$$
$$
\begin{array} {ccc}-1&-1&-1\-1&8&-1\-1&-1&-1\end{array}
$$ -
更多滤镜,魔改卷积核······
任务二
1.认识图片风格迁移
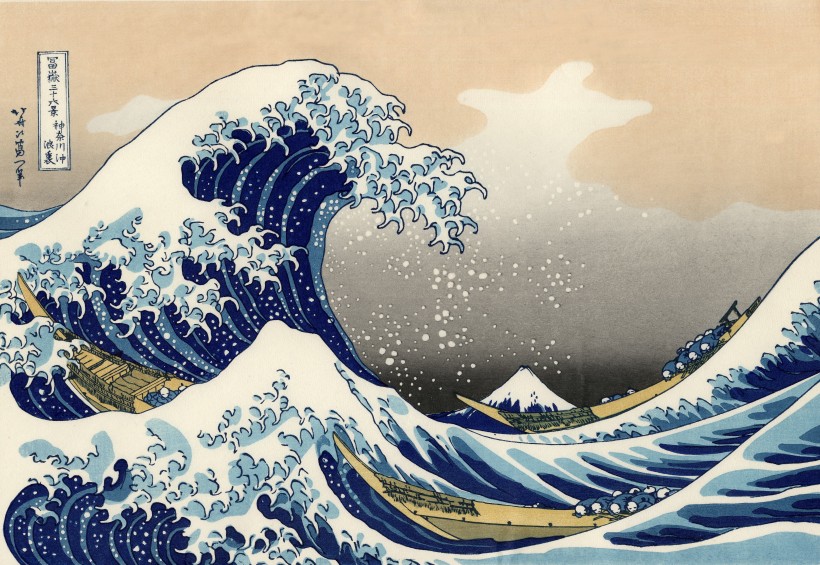
所谓图片风格迁移,是指利用程序算法学习特定图片的风格,然后再把这种风格应用到另外一张图片上的技术。
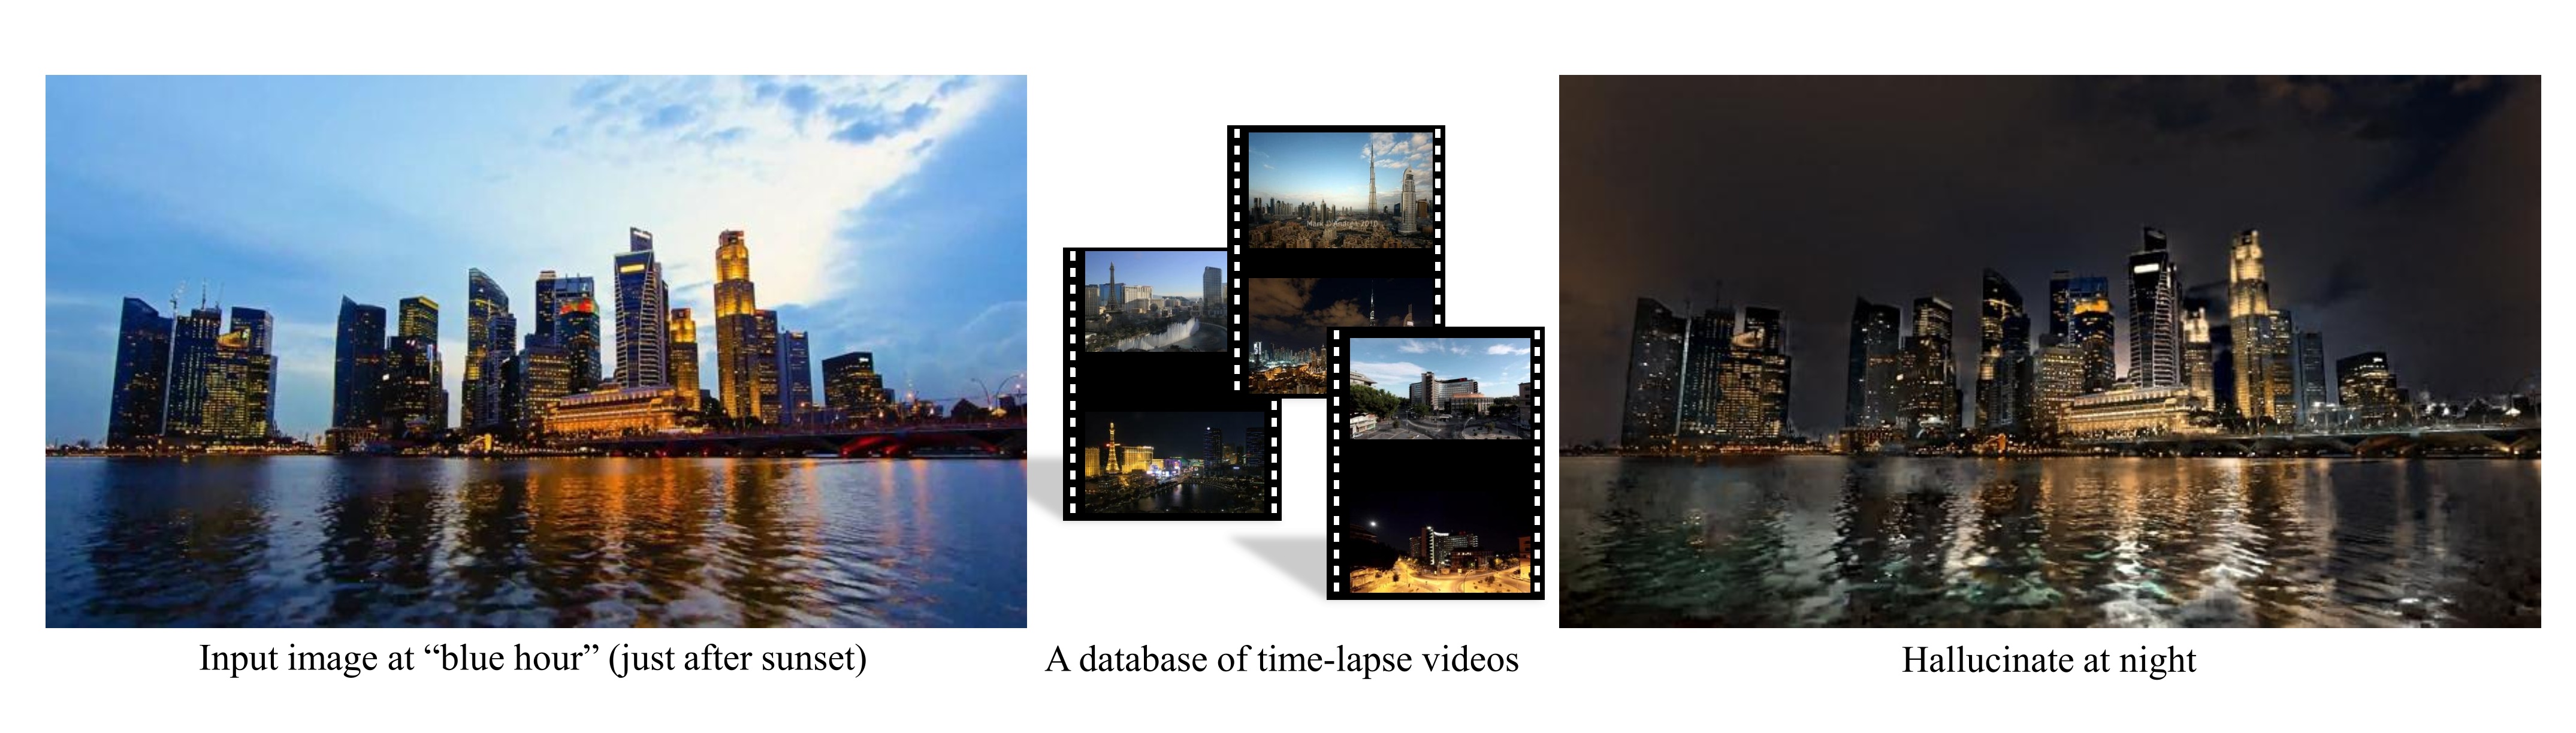
传统的方法是分析某类风格的图像,对其图像特征进行建模,再通过这个模型来应用到目标图像上,缺点是只能针对每一类图像单独建模,而且不同风格的图像建模的方法差异也很大:
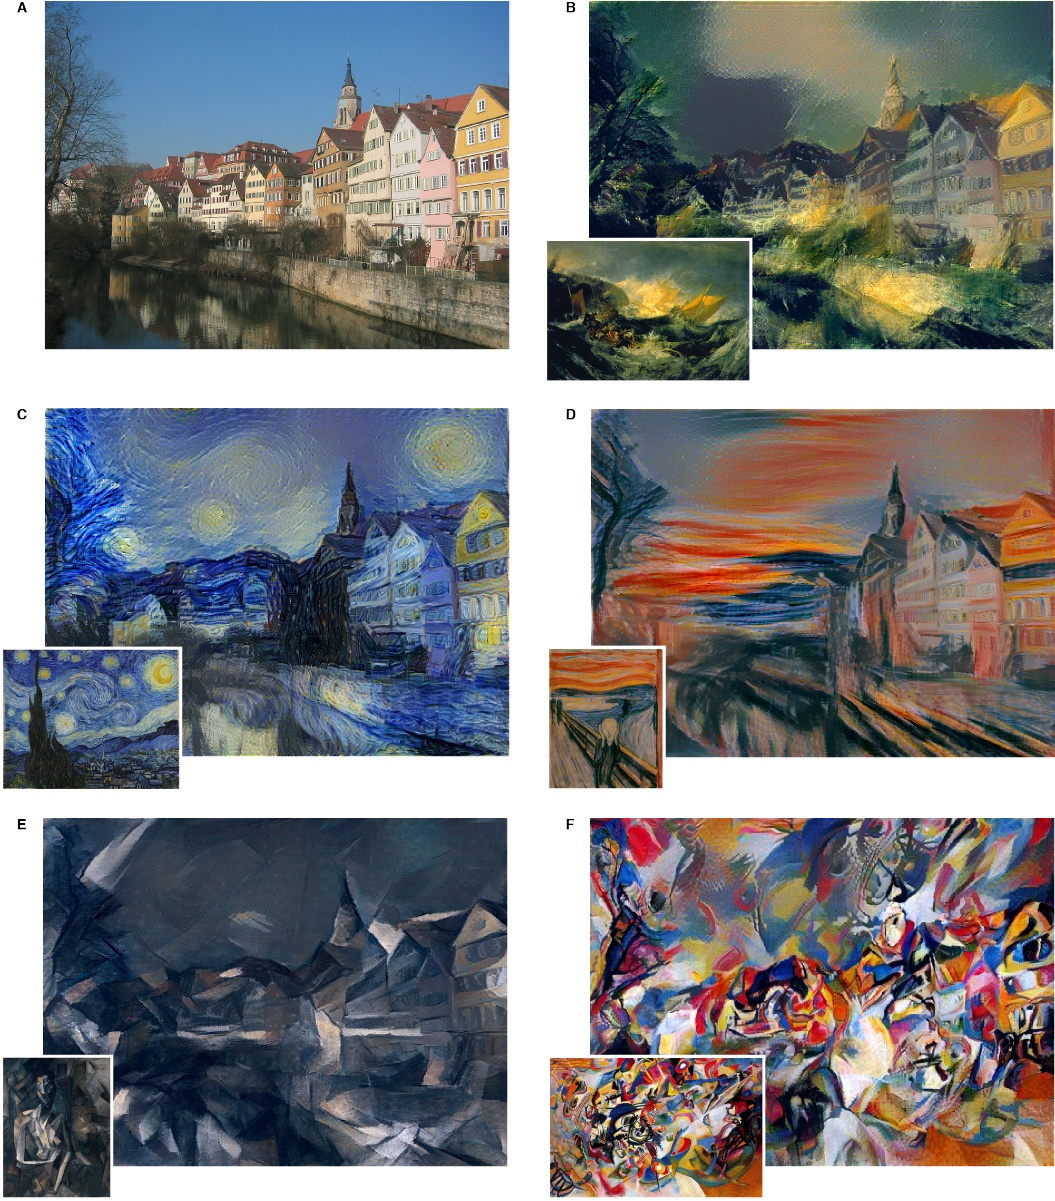
后来出现了基于神经网络学习的风格迁移算法,让程序使用任意一张图片的风格进行风格迁移成为可能:
基于神经网络的风格迁移算法,大致可以描述为:
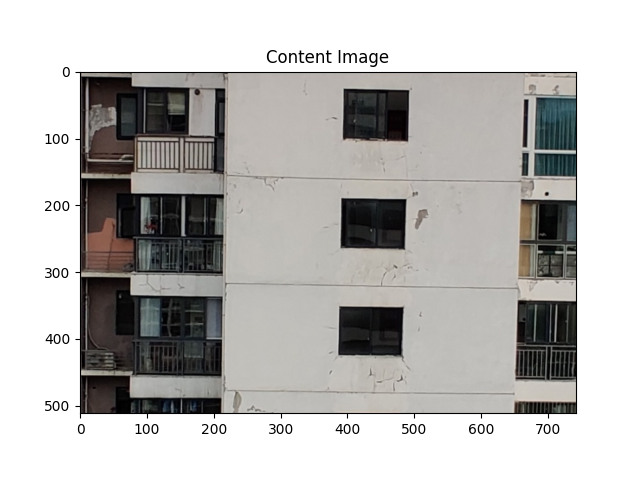
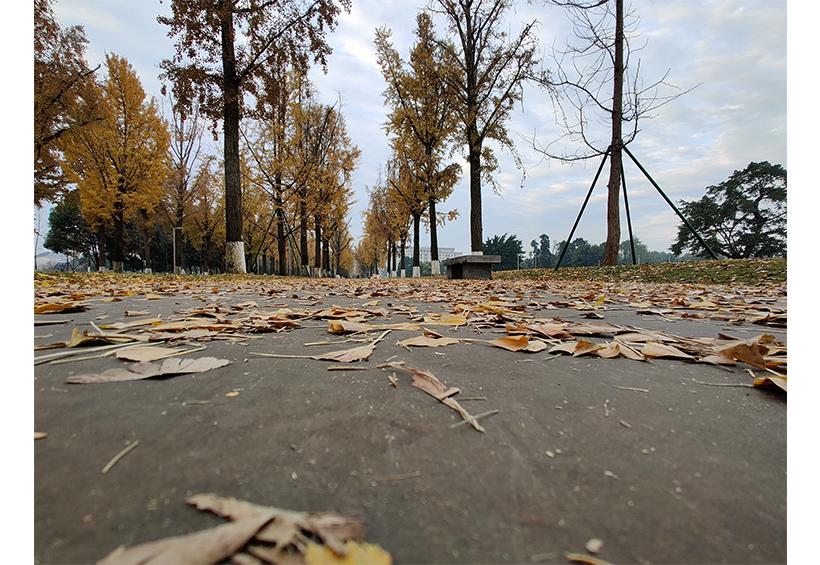
定义两个表示距离的变量,一个表示输入图片和内容图片的距离(Dc),一个表示输入图片和样式图片的距离(Ds).即Dc测量输入和内容图片的内容差异的距离,Ds则测量输入和样式图片之间样式的差异距离.优化Dc和Ds使之最小,即完成图像风格转移
2.使用pytorch实现图片风格迁移
1.核心思想
使用CNN(卷积神经网络)提取内容图片的内容和风格图片的风格,然后将这两项特征输入到一张新的图像中。对输入的图像提取出内容和风格与CNN提取的内容和风格进行Loss计算,用MSE度量,然后逐步对Loss进行优化,使Loss值达到最理想,将被优化的参数进行输出,这样输出的图片就达到了风格迁移的目的。
- 计算风格损失和内容损失,并逐步降低梯度优化损失,最后优化参数输出
- 通过预训练的卷积网络提取出更高纬度的图片内容和风格,最后通过定义内容损失函数和风格损失函数进行反向传播更新参数
2.功能分步实现
1.加载图片
|
|
2.计算损失
-
内容损失 $$ L_{content}\left(\overset\rightharpoonup p,\overset\rightharpoonup x,l\right)=\frac12\sum_{i,j} {(F_{i,j}^l-P_{i,j}^l)}^2\
$$1 2 3 4 5 6 7 8 9 10 11# *内容损失 class ContentLoss(nn.Module): def __init__(self, target,): super(ContentLoss, self).__init__() self.target = target.detach() def forward(self, input): self.loss = F.mse_loss(input, self.target) # *调用mse_loss计算矩阵均方损失 return input -
风格损失
style loss取自原始image和生成的image在神经网络中的Gram matrix的MSE(Gram矩阵可以在一定程度上反映原始图像的“风格”):
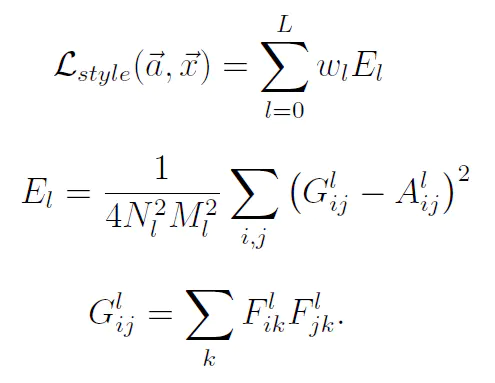
因为公式字母太多写LaTex太麻烦于是就用了图片XD1 2 3 4 5 6 7 8 9 10 11 12 13 14 15 16 17 18 19 20 21 22 23 24 25 26# *计算Gram矩阵 def gram_matrix(input): a, b, c, d = input.size() # a=batch size(=1) # *特征映射 b=number # *(c,d)=dimensions of a f. map (N=c*d) features = input.view(a * b, c * d) # *将矩阵F_XL重塑为\hat F_XL G = torch.mm(features, features.t()) # *计算gram积 # *归一化gram矩阵的值. return G.div(a * b * c * d) # *风格损失计算(与内容损失计算类似) class StyleLoss(nn.Module): def __init__(self, target_feature): super(StyleLoss, self).__init__() self.target = gram_matrix(target_feature).detach() def forward(self, input): G = gram_matrix(input) self.loss = F.mse_loss(G, self.target) return input
3.降低梯度
|
|
4.规范化输入图像以导入nn.Sequential
|
|
5.获得风格模型和损失量
|
|
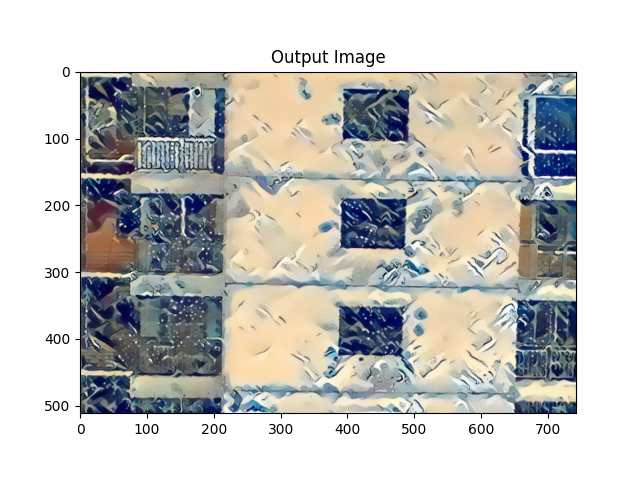
3.完整示例代码
|
|
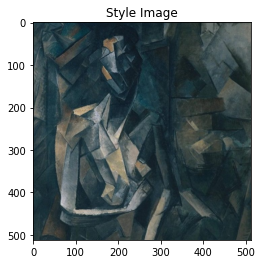
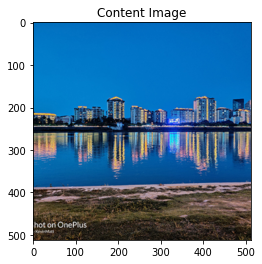
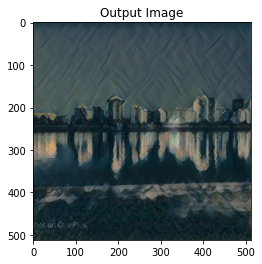
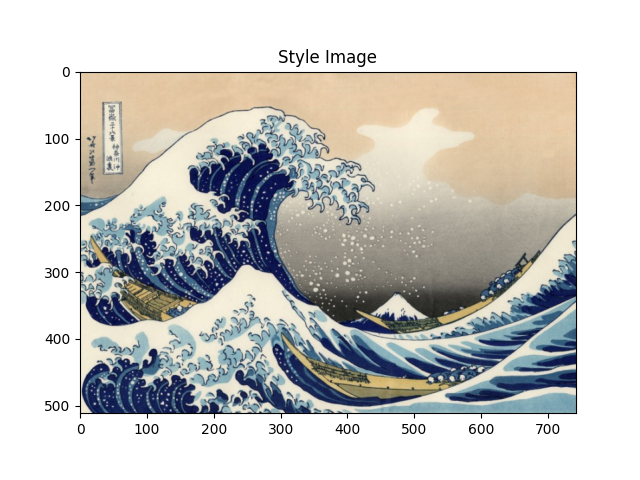
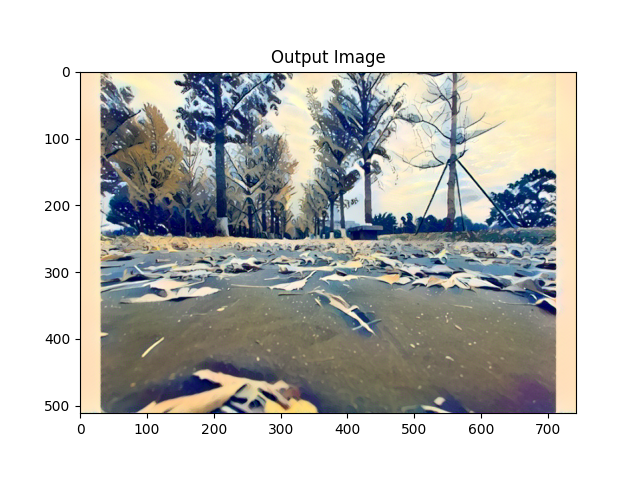
输入图片效果示例: